 BESTCITYTRIPS
The art of rubber stamping is a joy to practice! Even if you don’t have a creative bone in your body, you can still make beautiful things with a rubber stamp and a little bit of ingenuity.
Why do people use Rubber Stamps?
An example of printing is rubber stamping. Ink is applied to a raised design that has been carved into a material like rubber. To make a print, the inked pattern is applied to a suitable surface and then pressed down. Rubber stamps are a one of the best paper crafts for beginners. They frequently use paper to print off their rubber stamp designs. If the ink is compatible with the type of material, it is possible to print on a variety of materials, including paper, fabric, wood, glass, plastic, and metal.
To make rubber stamps, these are the essentials.
How to Carve Rubber
When you initially start manufacturing rubber stamps, you’ll need carving rubber. A block of carved rubber is the most common form of the material. As an eraser-like material, carving rubber is a great carving medium since it will not break or shatter when stressed by your tools.
Tool for Carving
When working with rubber, it’s important to use the right tools. You don’t want anything that’s built for wood, so don’t get anything too heavy-duty. Carving rubber or other crafts like ceramics requires special equipment, such as those intended for that purpose.
A Block of Wood
It’s not necessary to use a wooden block to make stamp handling more convenient. In order to improve the overall grip of the rubber stamp, you can attach it to the wooden block.
Adhesive
If you plan to use a wooden block, you might consider using a strong adhesive to connect your wooden block and your created stamp. If you don’t utilize a strong adhesive, your finished products may come apart while you’re working on them.
Pencil
Whether you want to design your imprint directly on the carving rubber or first on a piece of paper, a pencil will come in helpful. If you make a mistake, pencils are the greatest tools to have on hand.
Rubber Stamps are made using this method.
Begin by gathering your supplies and setting up your work space.
Prior to etching, you should set up your tools and yourself where you intend to carve
Create your own rubber stamp!
Even if you don’t intend to draw your design, having a general idea of what you want to accomplish with your carving rubber is beneficial.
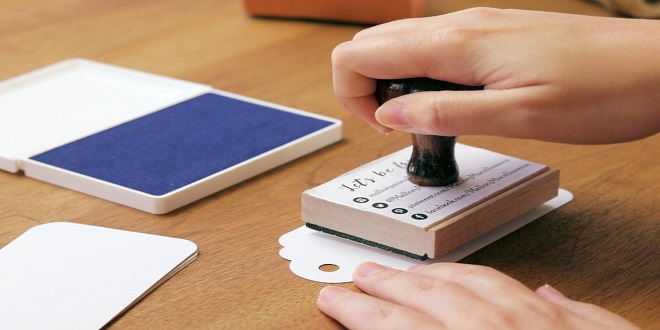
Make a stamp using a knife or a stylus.
When you’re set, begin slicing the rubber block into the proper stamp. For this task, you’ll make use of the carving tools you just acquired.
Create an easier-to-use tool by gluing your newly generated stamp on it.
Alternatively, a wooden block or saucer can do the trick. It’s entirely up to you whether or not you choose to attach your stamp to something else. If you’re not a fan of wood, there are plenty of different options available. Use a strong enough adhesive, however, to keep the two objects joined. Prior to affixing your stamp, you can label your product!
Conclusion
There is no learning curve for rubber stamping, which makes it a great hobby for anybody. Make your own stamps and give them out as gifts or keep them for yourself if you choose!